Welcome to Your Comfort For Life

Wellness Strategist & LifeStyle Mentor – let’s plan your next steps!

Upper Arm Skin Bumps & Pimples

People ask almost every week about upper arm skin bumps or pimples. You are not alone – it is a common problem. This is a method that may resolve this annoying and sometimes uncomfortable skin condition.

For most, attention to the upper arm when showering or bathing will improve the appearance and feel of the skin. Generally, it is a buildup of dead skin “glued” in place by oils coming from the pores. The buildup on dry skin may just feel bumpy, even get a little red. Others may experience pimples that get inflamed. Most of these conditions itch which is your body’s way to encourage you to “scratch away” the buildup. Here are the general directions we have found works for many to care for this skin:

  1. First select a gentle, hydrating cleanser or body wash that will aid to soften and cleanse the area. Need a suggestion for products that are effective and affordable – pop me a text or message.
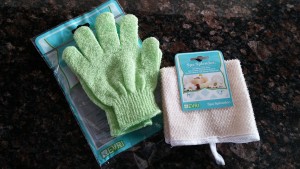
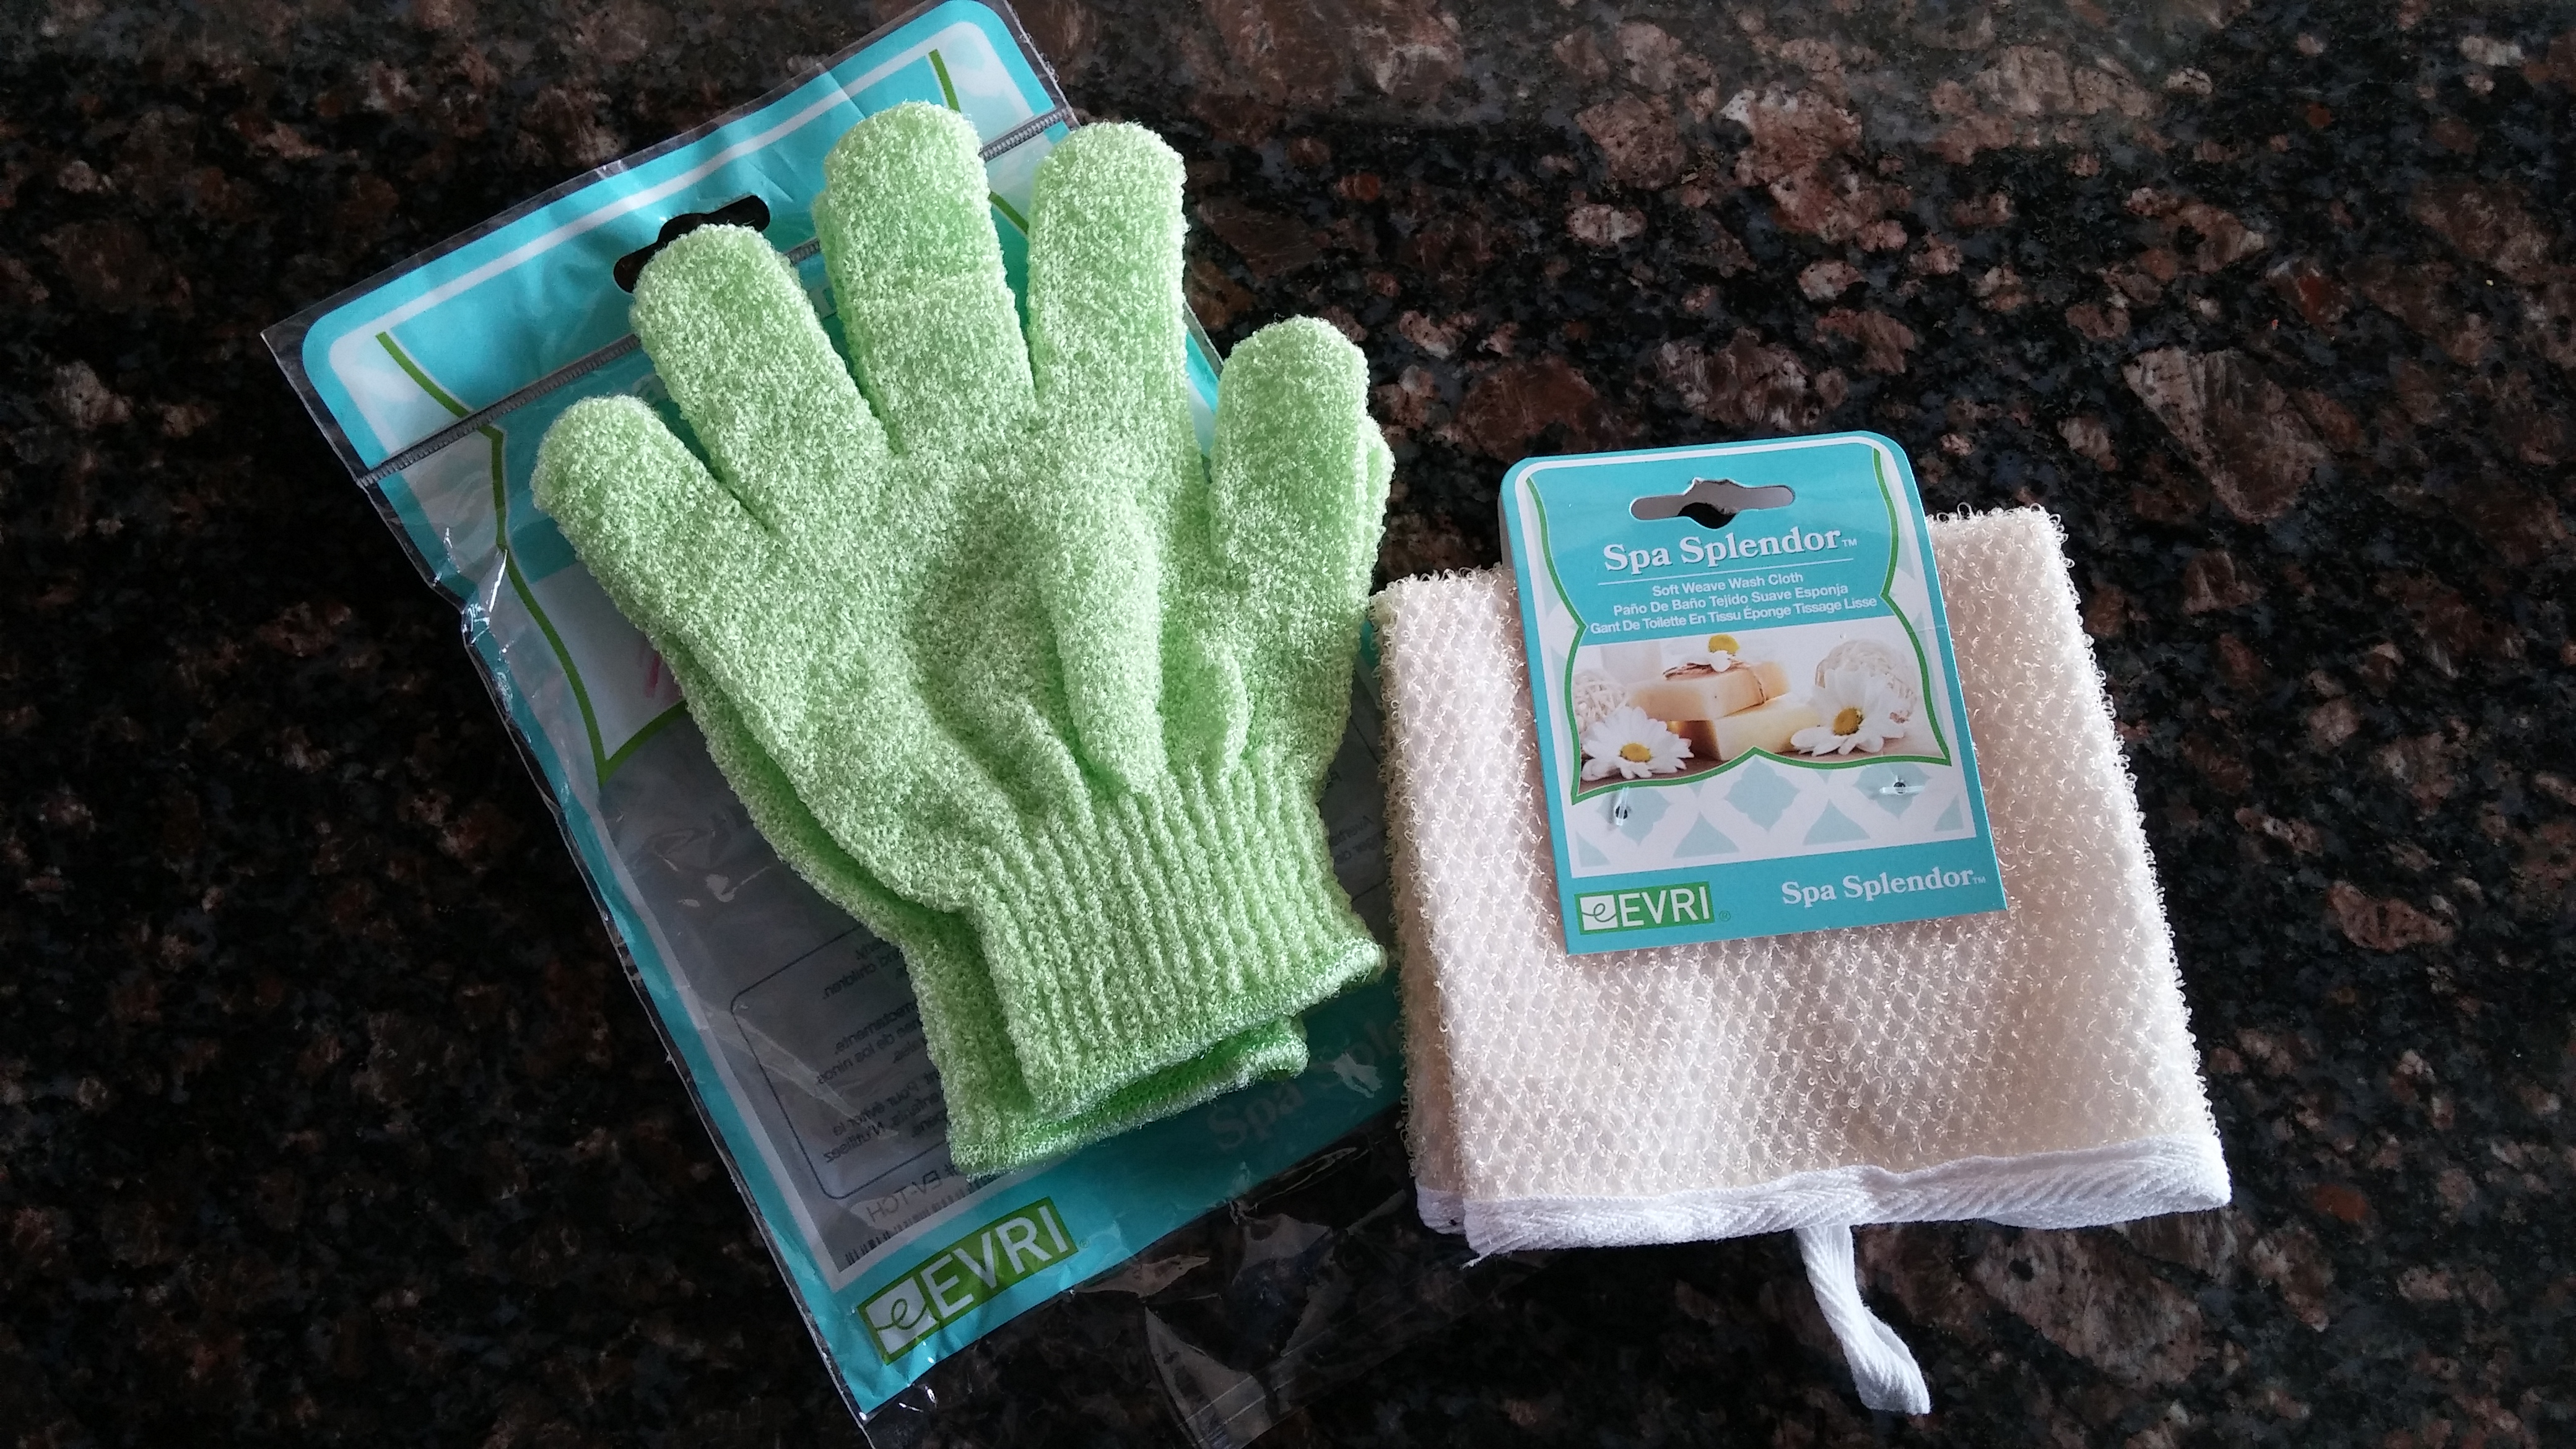
  2. Next use a washcloth or exfoliating cloth/glove with the cleanser or body wash in a circular motion all over the affected area. Some start with the washcloth, then graduate to an exfoliating fabric – the more sensitive the skin, the gentler the fabric you want to use. First time go gentle on the skin. As you continue to do this daily, you can be more firm.
  3. Be sure to rinse the skin thoroughly from any cleanser or body wash.
  4. Some find benefit using their facial toner to normalize the pH of the skin to receive the lotion without further irritation.
  5. Do not dry the skin – rather immediately apply a nourishing lotion to the wet/damp skin to further hydrate and protect the skin.

Within a week or two, you should see the upper arm skin becoming softer and smoother with less upper arm skin bumps & pimples. If the steps above does not get the results desired, we have found applying a pure essential oil like Lavender, Frankincense, or Melaleuca/Tea Tree to the skin before step 5. This can take some experimentation on which essential oil or blend of oils will give you best results. Reach out and take advantage of our experience to help with this! Reminder – sensitive skins may need the essential oil to be diluted by a carrier oil like Sweet Almond Oil. Also, be sure you are using a “real” essential oil and not a synthetic! After you have massaged the essential oil in, massage your lotion over to protect and seal moisture in.

If these skin bumps & pimples appear elsewhere on the body, the condition may be from acne or sport garments which may improve with the technique above but may benefit from different products. You can use the same general treatment as above but using an acne wash for cleansing the face, back, upper legs or buttocks. Then using the acne astringent to follow the cleansing to remove any cleanser residue and gently exfoliate. Then finish with an oil free moisturizer. Melaleuca (also called Tea Tree) oil is an excellent treatment for acneic skin and could be used before the oil free moisturizer. Again if you need help – I have a few lines of products that are clinically proven results and affordable.

Please let us know if you found this helpful. we love hearing from you and learning about your testimonials! We are here to discuss essential oils that may work best for your situation. We are not medical doctors or professionals – rather a licensed cosmetologist & esthetician with over 40 years of experience to share! You can call/text at (847) 502-8394, email at Liz@elizabethanthonygronert.com or find me on Facebook (Elizabeth Anthony Gronert). Perhaps we can be Journey Partners!

Don’t Skip Your Skin Care Toner!

Yep – we are moving from discussing healthy meals to healthy skin in this post! I am a licensed cosmetologist and esthetician with over 40 years of experience – I can’t believe I can say that! When I work with people, I find that time is always one of the reasons we don’t do “all of the steps” for an ideal skin care regimen. I totally get that. Too many steps cause people to not follow the program because, let’s face it –  Life is busy! But skipping your skin care toner is a bad choice long term! Here is why:

Since skin care toner will neutralize your skin back to it’s normal pH not only will your skin care products work better, they are less likely to irritate the skin. When the pH is normal, application of serums, lotions and creams are more effectively absorbed. If skin nutrition is applied immediately following cleansing, the skin may react negatively to those ingredients. By not using your skin care toner, applying treatments may cause skin problems instead of helping your skin like they were designed.

Use a cotton pad with your skin care toner to remove missed dirt, cleanser residue and give your skin a gentle exfoliation (dead skin cell removal) – FYI this is better than just misting the toner on your skin (which I know feels like a time saver but it is not a “skin saver!)

When hot outside, you can refrigerate your skin care toner for a cooling treatment after cleansing. But don’t put it in the fridge if that makes it more likely for you to forget or not take the time to get it!

If you found this information helpful, let us know! If you have any medical conditions, please consult your medical professional before following any of my suggestions here.

Questions, thoughts? You can call/text at (847) 502-8394, email at Liz@elizabethanthonygronert.com or find me on Facebook (Elizabeth Anthony Gronert).

Turkey Bone Broth White Chili Recipe

Many of you asked – so here I share one of our favorite nutritious recipes using our Turkey Bone Broth. (Download the “updated & complete” recipe on our website landing page here: www.elizabethanthonygronert.com )

After the bone broth is completed and before making any soups, we fill two old fashioned ice cube trays with the bone broth and put in the freezer. We use these cubes when boiling potatoes, cooking rice or the water when cooking/steaming vegetables! This adds wonderful flavor and loads of nutrition to the meal.

Turkey Bone Broth White Chili Recipe (using Elizabeth’s Turkey Bone Broth)

INGREDIENTS

  • 1 1/2 pounds organic ground turkey (I use organic turkey meat from carcass)
  • 2 (4 ounce) cans canned organic green chili peppers, chopped
  • 1-2 tablespoon ground cumin
  • 1-2 tablespoon dried oregano
  • 1 tablespoon + 1 tsp Salt
  • ground cayenne pepper to taste (1/2-1 tsp)
  • ground white pepper to taste (1 tsp) (I do ½ black, ½ white)
  • typically, I use 3 beans: cannellini, navy beans, Great Northern white bean 2-3 lbs (soak beans while cooking down the turkey carcass for bone broth)
  • Turkey bone broth from cooking Turkey carcass for 10 hours with vegetables
  • Organic Carrots – food processor
  • Organic Celery – food processor
  • Organic Parsley – chopped/food processor

Follow Turkey Bone Broth directions (download here https://elizabethanthonygronert.com/ ) After removing the carcass and “cook down veggies”, after making the trays described at the top of this post; I usually divide the broth into 2 pots – half for this turkey bone broth white chili recipe and half for turkey bone broth vegetable soup recipe.

Drain the soaked beans. Then cover the beans with the turkey broth – the beans should have 1/3 to ½ more liquid in the pot than beans (liquid to cover additional veggies, and meat.) If you want thicker soup, puree some of the beans with broth to make the soup thicker and creamier. I food process the green chilies, too. Add the processed parsley, carrots, celery and any other veggies you want to the soup (my family prefers just the carrots and celery.) Cook them to the almost desired doneness. Add the reserved turkey meat and seasonings.  Cook for a few minutes to let the flavors brew. Taste and add more seasoning if needed – lately I have been adding in some powdered garlic. This dish always seems to taste best after a day of rest in the refrigerator.

Making this soup is a 2 day process for me – bone broth and soak beans on the first day. Then making the soup and storing on the second day.

Enjoy! Let us know how this dish blesses your family! We are here bringing your comfort for life! Kris and Elizabeth Gronert (847) 502-8394 elizabeth@elizabethanthonygronert.com

Turkey Bone Broth – More than “Just Soup!”

(Full “updated” recipe available for free download on our website landing page – download here: https://elizabethanthonygronert.com/)

Thanks to our wellness friends, our soup making skills have moved up a few notches in our home. Grateful for the experience and generosity of my friend Tiffany Hinton, GF Mom Certified. Tiffany has been a valuable health coach and resource for our family. She has introduced me to the world where “food is medicine”. Particularly grateful for learning about Dr. Terry Wahls. I found Dr. Wahls book easy to read and have applied her wisdom to the way we shop and cook for our family’s health.

As a result, it’s not just great soup! We make incredibly nourishing, healing bone broth soups. Bone broth soups help reduce inflammation – an important every day therapy! This tutorial is for our “after Thanksgiving” Turkey Bone Broth Soup. Being an artist – I enjoy instructions so much more if there is a visual to go along. Therefore, photos have been taken at each step of this cooking adventure.

Thanksgiving day we smoked a turkey, baked a turkey and grilled a turkey breast (with the bones of course!) In this photo you will see the start of our Turkey Bone Broth. Here are the three carcasses covered by filtered water.

1128160954 My husband, Kris, installed a grow light by our sliding glass doors. Therefore, we are able to continue to have herbs, greens and tomatoes growing indoors. From this garden, I have added freshly picked organic parsley, thyme, sage along with some chopped garlic, sea salt and organic pepper to the pot.

1128161005

Whenever possible, we invest in organic produce. If I see any starting to go soft, where it may not be enjoyed fresh anymore, I place in a freezer bag. In addition, I have collected stems, leaves and even the roots of some of the organic plants we had in our outdoor garden this summer before it got cold and froze them. I use these vegetables in the “cook down” of the carcasses. We add these vegetable right away to enhance the flavor of the remaining meat on the bones. Some may prefer to wait till after the meat is collected (after 2 hours of cooking) which does make the process easier. We feel the flavor and nutrition added to the meat, is worth the extra work later when collecting the meat.

1128161050Because we still have organic Brussel sprout plants outdoors, decided to add some greens. Snipped off the top and added the leaves and stems with some tiny Brussel Sprouts! (I love these fresh leaves cooked in ghee with garlic too!)

1128161051b

Let everything cook for about two hours.

1128161052

At two hours the meat should be starting to fall off the bone. Time to use tongs to grab the carcasses, loose meat and bones to glean the usable meat. I have a plate to collect the cook down veggies, cartilage, skin and bones that will go back into the soup pot to continue cooking for an additional 8 hours.

Most people don’t realize how much meat they throw away with the carcass! Look at all the meat recovered from the turkey carcasses! Place the recovered usable meat (I do not like any fat or chewy meat in my soup!) in a container in the refrigerator to add to the completed soups tomorrow. All scraps, cartilage, bones and cook down veggies go back into the developing broth to cook down for another eight hours. I personally do not cook longer. The broth gets a unique smell after cooking twelve hours. So we stop around ten hours. We love the taste, smell and nutrition after 10 hours of cooking!

Finally, after the eight hours (ten hours total) of cooking has passed, we will prepare to get the wonderful bone broth. You may wish to let the hot pot cool for a bit. Place an empty large pot in the sink with a colander on top. Then pour the contents through the strainer – the remaining bones, meat and vegetable parts will be caught by the colander with the nutrient dense bone broth going through into the pot. Throw the bones and leftover meat and veggies away in a safe container that animals cannot get into. Poultry bones are very dangerous to pets and wild animals!

Refrigerate the pot of bone broth overnight. Most broths when refrigerated get a layer of heavy fat at the top  – it is especially thick with turkey bone broth. I remove most of this really goopy fat from the broth before continuing.

This turkey bone broth is ready to use for sauces, gravies, cooking vegetables, potatoes, rice or making soups. I made 2 different soups from this pot of broth plus a tray of cubes to use for cooking veggies, potatoes, etc. to boost nutrition! The first soup was a turkey white chili and the second was turkey vegetable! My family raved about both – they keep getting tastier and more nutritious every year!

My goal is to have at least a cup of bone broth soup every day! So nourishing and I can really feel the benefits! Let me know what you think of this tutorial….happy to share the soup recipes with you!

Let’s connect if we haven’t already! Send us an email at elizabeth@elizabethanthonygronert.com or call/text at (847) 502-8394. Elizabeth & Kris Gronert bringing you Comfort For Life!

Hidden Gluten, Allergens, Toxins & Carcinogens in Daily Living

img_0516

Where has the time disappeared to? Do you have the same problem? It has been a very full few months since I last wrote you. Some good news – new grandchild, visits with family, speaking at events and online. And some difficult times – loss of my father, continuing health challenges for myself & family members. During this time, we have been actively reaching out and helping people in their quest to be safe in their home. We have received powerful feedback that our Hidden Gluten, Allergens, Toxins & Carcinogens in Daily Living talk has empowered people and their families. The calls, text and emails keep coming for more opportunities to hear our talk. Watch our Event Calendar! There will be new dates consistently added where you and those you invite can attend a virtual presentation of Hidden Gluten, Allergens, Toxins & Carcinogens. Additional topics will be added as we serve others. While serving, we learn more of what we know or contacts we have that may bless you!

Have an event you need a speaker for? Our Talks can be customized  for your audience. Our current talk on Hidden Gluten, Allergens, etc. speaks to the Gluten & Allergy Free Community but can be modified for different groups. We have worked with those affected by cancer, auto-immune disease, autism, other behavioral and health issues. We have an eclectic background in coaching/mentoring small business owners, skin & personal care, personal image/brand, how to sleep more restoratively, and healthy lifestyle choices. We have worked with many other speakers that are advocates in the health and business world that you can trust.

If you found this information helpful, let us know! If you have any medical conditions, please consult your medical professional before following any of my suggestions here.

Questions, thoughts? You can call/text at (847) 502-8394, email at elizabeth@elizabethanthonygronert.com or find me on Facebook (Elizabeth Anthony Gronert). We look forward to helping you and your family have Comfort For Life! Elizabeth & Kris Gronert

Thank You Schaumburg GFAF Expo!

Schaumburg 2016 dates

Wow what a weekend! We want to thank the generosity of the Schaumburg GFAF Expo Vendors, the hard work of Jen Cafferty and Elizabeth Greifenkamp from Gluten Free Media Group (who created the GFAF Expos) and Otis Price from Willow Creek Community Church Care Center, South Barrington Campus. https://www.willowcreek.org/

0515161639a

Lots of gluten free food was donated to the Willow Creek Care Center along with fresh fruits, vegetables and a wheelbarrow full of sweets – a display from Swerve!

Thank you to Kris Gronert, Tiffany & Will Hinton (gfmomcertified.com) for running around end of the expo to help Mr. Price glean all that was left for our friends this week at the Willow Creek Care Center. https://www.willowcreekcarecenter.org

Mr. Price shared with us that there is a waiting list for those with food allergies or are medically required to be gluten free. They were excited to contact the people who will be blessed by this donation.

Thanks again to everyone for working so hard after a long 3 day event to benefit people in our community!

Please contact us if you would like more information regarding the Care Center at Willow Creek Church (they are always in need of donations – especially special diets), Willow Creek Community Church or learn more about being Gluten free, Allergen friendly, Paleo, Keto or Plant-based at the Nourished Festivals held across the country including Schaumburg/Chicago!

Like this post, send us an email at Liz@elizabethanthonygronert.com or call/text at (847) 502-8394. Elizabeth & Kris Gronert bringing you Comfort For Life!

Glowing, Nourished Skin Even When Cold & Dry Out!

Want to have glowing, nourished skin even when it is cold and dry out? Here are some “winterizing” tips to prepare your skin:

  1. Use only safe, non-toxic, non-carcinogenic products on your body. Unfortunately, many retail products still contain questionable ingredients. Check your product labels! Just because it is expensive or a “brand name” does not mean it is the best or safe.
  2. I know the air is colder but try not to raise the temperature of the water you use in the bath or shower. The hotter the water, the more it dries out your skin!20160110_105110
  3. Exfoliate and remove the dead skin flakes. This way when you apply moisturizers they will hydrate your living skin – not the skin flakes that are about to fall off! Use a fresh mitt or cloth in the shower with a moisturizing bath bar or body wash. Yep – that means 7 on the shelf  so you can use fresh each day. Used ones can be air dried, then placed in your washer on laundry day – just like you would a washcloth. Warm water wash and air dry – the dryer may get too hot for these fabrics.
  4. For any type of cleaning (personal hygiene or home cleaning) I recommend synthetic since natural fibers are not able to be cleaned effectively and definitely not disinfected. Natural fibers like a loofah take a long time to dry (if ever) and may grow microorganisms that are not good for anyone’s skin but especially bad if you are immunocompromised in any way. If you are not used to exfoliating (physical cloth rubbing skin to remove dead skin cells) you may want to start with a simple fabric washcloth. Some find the loopy soft plastic puffs or washcloths with a loopy plastic side a bit more effective. In a few weeks you may try the exfoliating gloves – caution – they may be too exfoliating for sensitive or thinner over-50 skin. Have thos annoying upper arm bumps? (which can occur on a number of body areas – see article on 3.31.2017 for more info). Exfoliating cloth/mitt is the best treatment for those bumps many people get on the back of their upper arm combined with hydrating body wash, then apply protective lotion/cream/oil over the moist skin.
  5. Another option for exfoliation are some of the wonderful salt, sugar and blend scrubs available. I prefer to use these products in the bath so the wonderful, healing ingredients can absorb nicely into the skin after your scrub. Really wonderful if you can find a kind soul to scrub your back too! There are many D-I-Y recipes online – salt or sugar are excellent exfoliators mixed with a healing oil like coconut or almond. For additional benefits, think about incorporating essential oils that leave skin dewy after the salt polish. To keep jars sanitary, use a spoon or spatula to remove what you need. Wash the spoon between uses to avoid contamination jars. I prefer to make things more liquid and put in a squirt bottle. Keep the nozzle free and clear of the skin. For more ideas on keeping things clean, check out my article “The Hand Towel Did It” on 6.30.2019.
  6. Turn your bath into soothing skin therapy by adding a capful of hydrating, calming bath oil. Add some Epsom salts for a healthy body detox plus the added magnesium and sulfur!
  7. After your bath and shower, best to let yourself air dry and apply your lotion while your skin is still moist. Be sure to use a moisturizer with a protectant so you don’t lose all the moisture in your skin back into the air. During the really cold or dry months, add your favorite essential oils, almond oil or other oils to boost the healing and sealing power! Lots of evidence that a relaxing bath, helps one have a good night’s sleep – proper sleep helps the skin look and feel it’s best too!

Using these tips your skin will be polished and nourished – ready for the cold and dry season. With skin being your largest organ, consider using these tips year round to keep it healthy and protecting you.

If you found this information helpful, let us know! If you have any medical conditions, please consult your medical professional before following any of my suggestions here.

Questions, thoughts? You can call/text at (847) 502-8394, email at Liz@elizabethanthonygronert.com or find me on Facebook (Elizabeth Anthony Gronert). We look forward to helping you and your family have Comfort For Life! Elizabeth & Kris Gronert

Cracked Heels Treatment that Works!

Are cracked, tender heels a problem for you or someone you love? Here are a few quick tips that I have successfully used when I was a caregiver for my mother and others that prevented or treated the cracked skin on their heels. The cracked, dried skin took time to develop and it will take diligent discipline to nourish the heel skin back to supple health.

If the cracks on the heel have bled or are tender, the priority must be to help them heal. If there is an infection or irritated fissure (broken, open wrinkle in the skin) or the person has medical conditions like Diabetes (which may slow healing on the hands and feet), please consult your medical professional first. Follow their instructions to healing this issue.

Once you have determined the area is not infected or has healed per your doctor’s instruction, you can start practicing better habits to keep the skin on your heels healthy. Read the labels on your products to avoid any allergens, gluten or any questionable ingredients. Clean the feet with a gentle, non-drying cleanser. Then place the feet in a tub to soak in a gentle, non-detergent bath with Epsom salts, essential oils and bath oil.  This will soften and nurture the skin. We have had excellent results adding melaleuca or lavender oil well dispersed in the water. Using a foot bathe with vibration or ability to bubble keeps the water blended. You want to monitor** that the essential oils do not collect around the ankles.

**Before using essential oils, learn basic safety and be aware of precautions. Do not use essential oils (EO’s) on babies, children, pregnant women or anyone with allergies before reading up on how to safely use them. Essential oils are the medicine that has been used for centuries. It is a gift to be used responsibly. I recommend AromaWeb.com as a resource (they do not sell essential oils) for general safety, EO constituents and useful recipes.

Melaleuca oil (also called tea tree oil) is a natural anti-inflammatory with antibacterial, antifungal qualities. It is also a natural antihistamine to reduce any swelling and redness. Apply the melaleuca oil or other EO of your choice then apply a protecting lotion/cream/oil over the EO to the areas of the foot needing healing. Cover the foot with a white sock (some prefer non-bleached or non-dyed sock.) Apply the EO and oil…or learn to make it into a balm or ointment for simplicity!) twice daily to speed healing.

Once any cracks or irritated areas have healed, we can now work to improve the skin tissue of the heel. Soak the feet in a tub with a soothing non-detergent bath oil – add essential oils  (Melaleuca, Lavender, Marjoram, Thyme are great ones to try!) and Epsom salts for added benefit. Once the skin has softened, follow the directions below the picture to gently exfoliate the heel using a pedicure paddle. Our favorite is Swedish Clover Föt File imported by Flowery.0 20150401_140848This paddle has a coarser side (raised nubs on handle) and a smoothing side (horizontal lines on handle). Depending on the thickness of the skin (as we mature our skin thins so be precise – stay on the thick bottom skin of the foot – usually has a yellowish tint.) Do not use this paddle on someone with diabetes or other medical condition without consulting their doctor first!

For most people, you can start with the coarser side to gently rub the thick skin of the heel (some have this this thick skin on the ball of the foot and big toe) to smooth, soften this heavy pad – when it is very thick, it wants to crack. By reducing the thickness, the skin is able to be more pliable. Be sure to stay on the thick padded parts of the heel, ball of foot or big toe at all times. Focus on the areas that want to crack.

Most common mistake people make using a foot file is removing too many layers of skin. You can always buff a bit more the next day or week. But if you remove too much, it can cause discomfort. Your body built this callous for protection. Usually to cushion a bone that is pushing against the shoe. Start by just a few swipes of the coarser side to soften. The 2nd most common mistake is many people forget to then go back and polish this skin smooth with the finer side of the paddle. If you skip this second step, your body may perceive the swipes from the coarser side as an injury and double it’s effort to replace the skin cells removed. So it is very important that this is always a two step process. Sand a few times, then smooth the skin. I keep my paddle on a suction cup hook in the shower so I remember to use once a week or so for maintenance. For those with very little callous, you may only need to use the smooth side of the foot paddle.

Rinse the feet. While skin is till moist apply your essential oils, ointment or heavy skin oil to the spots that tend to crack. Then massage the whole foot with lotion/cream. Depending on the lotion/cream you use, an all-over application of skin oil (coconut, almond or even olive oils works) may be required to prevent moisture loss. This will help the skin heal and regain its pliable, healthy state.

Application of the products after every bath and shower is suggested to retain the moisture in the skin to eliminate cracked heels forever.

Wash and disinfect the foot file between uses for same person. Washable/sanitizable nail files, cuticle pushers, nail clippers and foot files are personal care items one should not share. I have worked with families that have had a hard time eliminating athlete’s foot…..and it many times was due to the common use of same toenail clippers by all family members. Life gets busy and even though most of the people were diligent in their cleaning of the tools after use – there are so many nooks and crannies on the clippers and foot file that I recommend everyone have their own kit. These are inexpensive items to have a set for each person.

When choosing tools for personal care, I encourage you to use materials that can be reliably cleaned (sanitized) and disinfected. (For definitions of these terms go to my article “The Hand Towel Did It” dated 6.30.2019.) Metal, plastic and glass can be cleaned effectively. Items that cannot be sanitized properly are loofahs, sponge, natural sponge, pumice stones or natural wood. These are porous surfaces that over time may encourage growth of microorganisms that could cross contaminate (spread the germs growing on it to) your skin.

If you found this helpful, let us know. Reminder, if you have any medical condition – consult your doctor before trying any of our suggested treatments. These are cosmetic, skin quality suggestions only. In this article, we are sharing over three decades of success/experience as a cosmetologist/esthetician. Visit us on Facebook (Elizabeth Anthony Gronert), send us an email at liz@elizabethanthonygronert.com or call/text at (847) 502-8394. Elizabeth & Kris Gronert bringing you Comfort For Life!

Tips for a Gluten & Allergy Free Trade Show

Life has been a whirlwind of meeting new people, savoring time with friends, sharing valuable information and tools! Spent this last weekend in Atlanta with our friends, the Domanicos, while attending the Gluten Free Allergy Free Expo at the Cobb Galleria. I love these events – I always come away with lots of new knowledge plus contentment knowing I have served people by helping them connect with valuable and money-saving resources!

The next GFAF Expo will be in Schaumburg Illinois – my stomping grounds. Excited to “host” many VIP’s to the area that have become friends and associates over the last year since I started attending these events. Here’s my list of Tips for Successfully Attending a Gluten & Allergy Free Trade Show:

value-of-tradeshows

  1. Wear layers of comfortable clothing. Temperatures can run the gamut – some places are hot outside and inside – so have layers that you can easily remove and stow in a tote. Even when it is cold outside, it can be brutally warm inside. I found this true when I was in Texas a few months ago. They are not used to cold or icy weather, so the heat in the hall was high to accommodate the locals but about boiled this Chicago, menopausal girl! Then half way through the show, the hall became cold since many complained about the heat and I had to go find a jacket…. The reverse can be true – brutal hot outside and a refrigerator in the hall inside… so be prepared by wearing layers.
  2. Comfy, supportive shoes ideally with a sock or liner to protect skin – an emphasis on supportive – you have only two feet to make it through your whole life. Take care of them with shoes that are not only comfortable but have support built in to preserve the integrity and health of your foot. Socks prevent blisters and uncomfortable chafing. I have learned that when I have to stand or walk for long periods it helps to have a second pair of shoes to change into. I know this sounds like a pain but when my feet hurt, I hurt all over!
  3. You need high protein snacks and a baggie of veggies/fruit. There are usually lots of carbs to taste at the gluten and allergy free expos so your body will be craving protein and natural fibers for balance;-) Bringing a water bottle you can refill is a good idea. Most of the trade shows I have attended have limited if any access to a snack bar or concessions.
  4. Be prepared to wait in lines – I encourage you to bring and use your strollers, wheel chair, walker or cane-seat.
  5. You will have the opportunity to purchase “deals” from some of the vendors and many give out samples, coupons, magazines, etc. Bring a couple reusable tote bags that you can pull out as you accumulate goodies. Some who have challenges carrying may want to bring a rolling bag or suitcase to stow things instead of lugging them around on your shoulder.
  6. If you are local and can carry a lot of things home, plan to be at the expo at the end of the last day and have bags to fill. Many vendors choose to give away display product rather than pack and ship back home.
  7. Attend the speakers’ presentations. You will learn so much from those who have traveled the path you are on – useful information for your journey or valuable information to share with someone you care about. Plus you get to know the speaker/author/blogger and will find the ones you want to sign up for their emails/online events or purchase their books.
  8. Be considerate of those with fragrance sensitivities. Many who attend have severe allergies and your favorite perfume or bath spray could ruin their whole day or week.
  9. Really VISIT each booth and talk to the people that are there. Many have a story to share that may help you along your path. Some booths are there just to “sell” or may have “hired” help with no knowledge of our industry….but if you take the time (and full advantage of your ticket price) to look each person you meet in the eye, most of the people that have traveled to this conference have a lot to offer you and you will be much richer for taking the time to find it…and have many more friends/resources to reach out to when you have questions or need help.
  10. Get on the email lists for the people and events that resonate with you. Most will have valuable resources that they continue to share throughout the year. Plus savings for the next time the conference returns to town.

If you found this helpful, please let me know. Send me an email to Liz@elizabethanthonygronert.com or call/text at (847) 502-8394. Elizabeth & Kris Gronert bringing you Comfort For Life!

Watch out for Cross Contamination….They said it was gluten free but it wasn’t!

I recently ate at three different restaurants that promoted they had gluten free fare. The first two had a big sign saying Gluten Free Pancakes. When I inquired if the gluten free pancakes were cooked on a dedicated grill (meaning there was a grill used exclusively for gluten free food and another for gluten foods), the answer both times was NO! My big concern is that they thought they were offering “safe” gluten free pancakes – both restaurants have had no training in what gluten free and what celiac safe meant. I shared with them that by grilling the pancakes on the same griddle as gluten food would cause someone who is celiac or gluten intolerant a HUGE problem. That they could make someone very ill if they were not well-educated (which all of us start in that place!) Both times I spoke with a manager/owner and they sort of shrugged it off. One even shared that they have gluten free patrons who bring in their own gluten free bread and the server toasts it for them in their “gluten-laden” toaster!

The third restaurant was enlightened. They offered gluten free options for bread, rolls and chips. They had a disclaimer on their menu that the server also was sure to review with me when I ordered gluten free. The menu and server told me that they offered these items but wanted me to know that they are assembled in a kitchen where gluten also coexists. Cross contamination was a possibility and they were very assertive to be sure I knew that.

I feel I have always been gluten intolerant and glad that I learned that being gluten free may reduce inflammation from my autoimmune disease called ankylosing spondylitis. I am not celiac – if there is a smidge of gluten on my meal, it will not destroy the villi in my gut -but that same speck could make a celiac sick for a couple weeks to a couple months.  For those not familiar – gluten is the sticky protein in wheat, rye, barley and spelt. If you would like a list of common ingredients to avoid, pop me an email or give me a call. My friend, Advocate & Author, Tiffany Hinton has a document I can share with you as well as she has almost a dozen cookbooks to help you stay gluten free yet make tasty meals the whole family will enjoy!

Another way people are accidentally “glutened” is products that say they are gluten free on the packaging…then on the back it says that this item was manufactured in a plant or on equipment that may have processed wheat, soy, peanuts, and other allergens. Anyone who is a celiac, gluten intolerant, gluten allergic will tell you they do not consider anything that may have accidentally been contaminated gluten free since the smallest amount of gluten will rock their world.

Make sure when you are looking for a place to eat or products to enjoy that there’s no chance the products/food may have been contaminated…..ask a few questions to keep yourself and the ones you love that are gluten free safe and comfortable!

If you found this helpful, please let me know. Send me an email to Liz@elizabethanthonygronert.com or call/text at (847) 502-8394. Elizabeth & Kris Gronert bringing you Comfort For Life!